This is an ongoing project started in Autumn 2021 and that I am hoping to complete during the summer 2024. You can find all the different steps in the work breakdown structure at the end of this page.

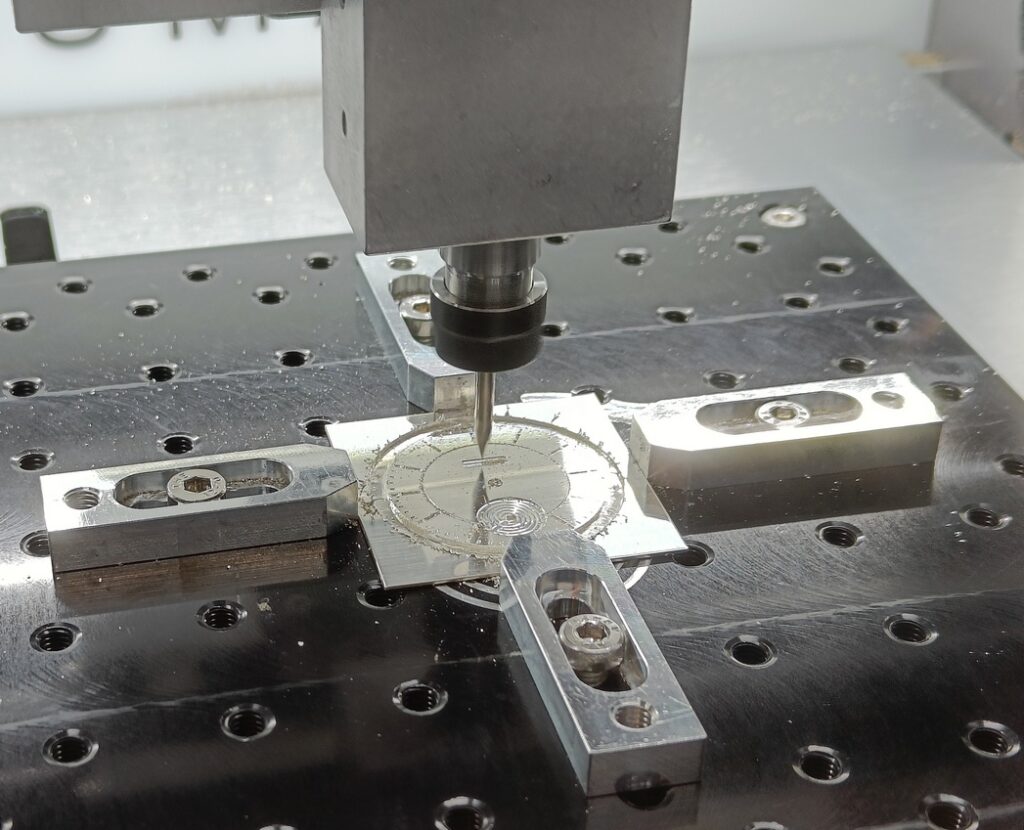
The end product of the first version of the sport watch was of very poor quality because of precision issues. The main change for version 2 is the use of a desktop CNC machine that enabled me to improve precision drastically and to make myself elements that I had previously outsourced.
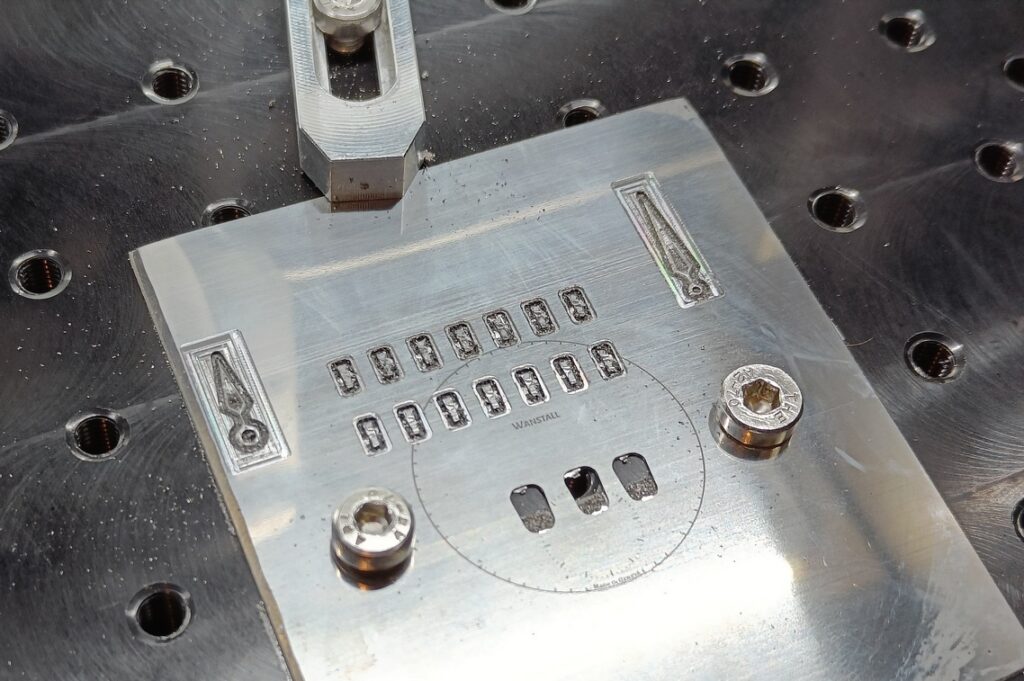
I was able to cut the dial, hands, indices instead of 3D printing them and to engrave the dial instead of having it pad printed.
The elements I still had to outsource was the 3D printing of the case and caseback as my CNC is not powerful enough to remove that much hard metal and only works along 3 axes and the buying of crystals, gaskets, and the movement.
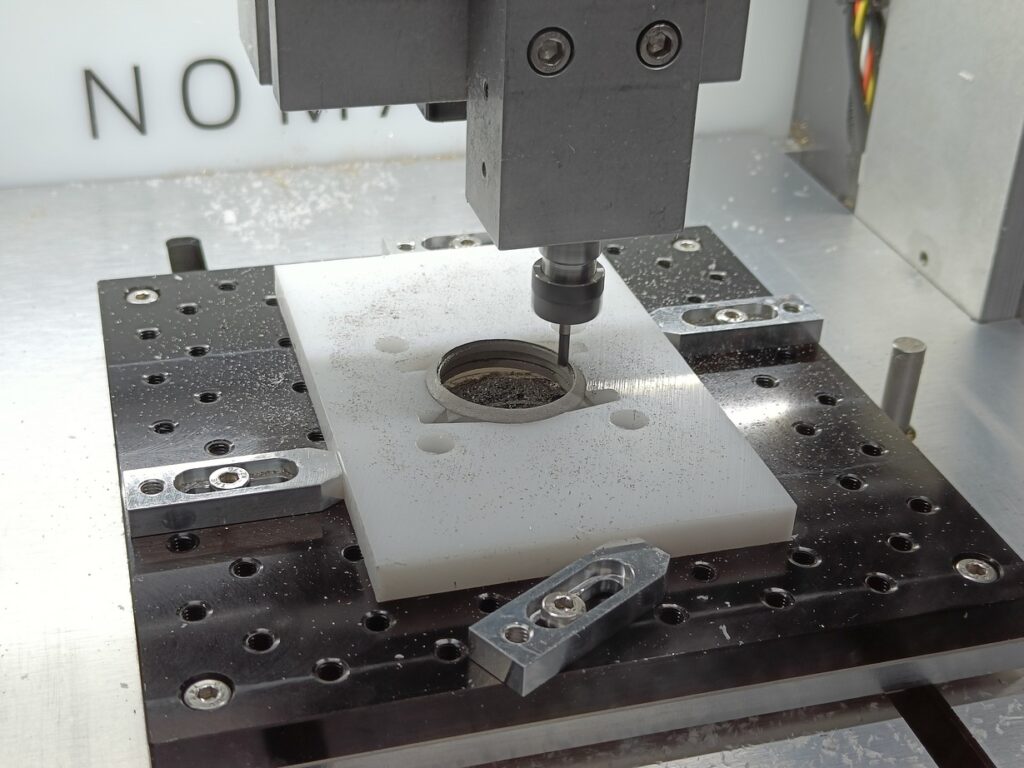
For the case, once 3D printed, I used the CNC machine to bring all the elements to the exact dimensions, which allowed for perfect friction fit of crystals.
In terms of design, the changes were small. On the case, I added holes for the straps to allow for fine adjustment.

On the hands, I beveled the sides and created a central hole for the lume instead of a recess.

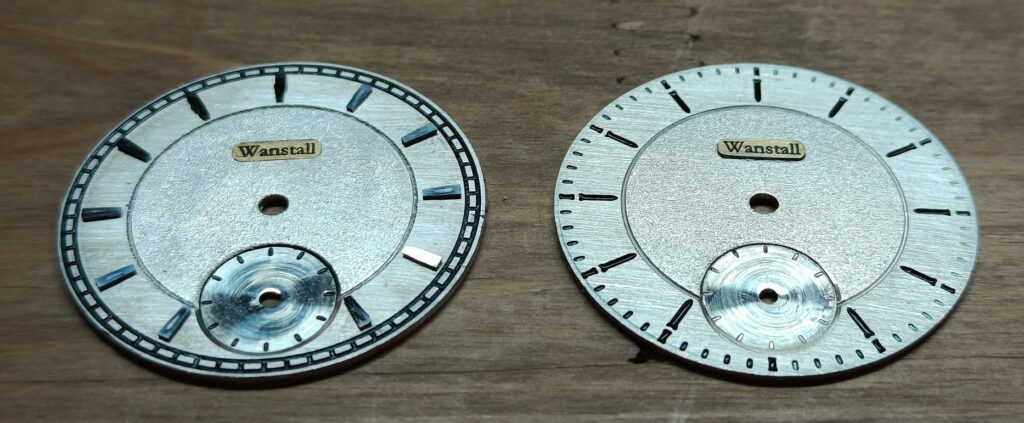
On the dial, I used engraving combined with engraver’s wax instead of pad printing and the lines are therefore a bit thicker. I changed the logo from a raised signed to an embedded engraved plaque. The plaque is made of brass to create a contrast with the silver of the rest of the dial.
You will find below a work breakdown structure with all the main steps in the creation of the watch.
Case and caseback
- Design – using FreeCAD or the free version of Fusion360 (or similar software), create an STL mesh of the case and caseback
- 3D printing – using a 3D printing service, which can be found using Craftcloud, have the case and caseback printed in stainless steel (using Jet Binding or Laser Sintering technology)
- Preparing the case and caseback
- Bringing to tolerance – 3D printing precision is not good enough for friction fitting the crystals, so use a CNC router to bring the case and caseback to the exact sizes you need
- Tapping screw holes – use a tap to create the threads in the screw holes (0.8mm hole for a final M1 screw)
- Surface finish – use a Dremel with rotary abrasive wheels and then cotton ends with different grits of polish to get the right surface finish
- Insert gaskets and press crystals – use grease on the gaskets before putting them in position for a good seal and then press fit the crystals
Movement
- Preparing the movement – Take the movement apart
- Reshaping the bridges
- Cut the bridges with a precision saw
- Finish the shaping with hand files or a rotary tool with abrasive wheels
- Sand the sides of the bridges
- Straight grain the top of the bridges with abrasive paper (or use another technique)
- Create the bevels with a file
- Polish the bevels with increasingly fine abrasive paper on a flat file
- Cleaning the movement
- Clean all components, preferably with an ultrasonic cleaner
- Clean all components in pure alcohol
- Assembly and adjusting
- Reassemble and oil the movement
- Adjust the timing using a timegrapher
Dial
- Design – create the design for the dial, using Fusion 360 at first to test different options, then a 2D CAM software to create G-code
- Cutting – cut the shape of the dial and engrave the different elements with a CNC router
- Texturing – de-burr the dial post-CNC and create textures using a rotary tool and/or abrasive paper (use sticky paper cut to shape to protect one area while working on the other)
- Wax – fill in the engraving with engraver’s wax by heating the dial and applying the wax to make it melt in the grooves, then remove the excess wax (squeegee and/or cotton with acetone)
Hands
- Design – create the design for the dial, using Fusion 360 at first to test different options, then a 2D CAM software to create G-code
- Cutting – cut the shape of the hands with a CNC router
- Finishing – create the bevels and the surface finish using files and abrasive papers
- Lume – apply lume from the bottom of the hands, letting the lume fill the hole and dry in place
- Bringing the hole to size – use a reamer to bring the hole to the exact size for a friction fit